Wednesday, May 25, 2011

Tarragon Chicken-in-a-Pot Pies


I have been on a carb freak out this last week or ten days. I cannot put enough bread and bread-like substances into my body. I made some whole wheat English muffins a few days ago? Big mistake. They were fucking delicious and I made 12 of them and they were gone in 3 days. You would think that woulda slaked mine thirst for bread, but alas, it did not even. One of my very, very favorite options for putting bread in my body is the much revered Bread Bowl. I can’t get enough of a Bread Bowl. The prob with a bread bowl, other than that the carbs contained within are proximate to lethal, is that a Bread Bowl goes best with a hot and creamy soup. Brothy soups just don’t work well in a bread bowl. Cream-based soups are fantastic and wonderful and everybody loves them, but if I am already going down the path of moderate self destruction by introducing an entire bowl made of bread into my person, I can’t be fillin it up with heavy cream. I mean, I can, I just, I can’t. This little dish is a fairly decent compromise. I get some lean protein and some veg and some fat free milk, and my reward is an entire edible bowl of bread that I can rip apart with my talons like a bird of prey and also eat a large portion of my sig. other’s breadbowl because it was “too much bread” for him. As if such a thing exists.

Don't worry, I've had plenty of practice with monkeys.
The thing about a bread bowl also, is that it can be difficult to locate out in the wild. Some bakeries will have them. Some grocery stores will actually carry the precise 4.5 ounce country or peasant rolls that this recipe originally calls for. 4.5, my ass. If you are really in it to win it, you will go to the weird soup station in your grocery store – the one where you can purchase any number of bland and boring pre-made soups with enough sodium content to brine an entire hog. Soups either boxed up and ready to go, or hot in a deep cauldron of murky sneezes, in case you have to have your gross hot soup right the hell then and there. Find that place, and you will also find the Bread Bowls. A whopping 6 ounces of tangy sourdough, lovingly wrapped with a golden twist tie, because this a special occasion of destruction and everybody wants to look nice.

At least these vegetables won't burden you with medical bills.
Also, a note about tarragon – I fucking hate it. I have made this recipe 3 times now and the clearest self-knowledge I have discovered is that I cannot stand the flavor of tarragon on its own. I am quite surprised by this. I love black jelly beans. I love fennel (in the right context of other foods). I love anise flavored liquors (if I am already drunk and doing shots with people I knew in high school). Why wouldn’t I love tarragon, which is the very embodiment of that weird licorice flave? The answer is: I don’t know but I just don’t. So, after three tries at this puppy, I have figured out that if I use half the tarragon that the recipe calls for (which by the by is another from the Cooking Light – Best of Everyday Favorites), and cut it with some plain ol’ dried Italian Seasoning, I am not totally pissed off at the outcome. But the tarragon alone is too much, and the original amount is too much. If for some reason you wake up every day for the express purpose of finding an excuse to cook with tarragon, then double the amount I list, and leave off the Italian Seasoning. If you are a normal human bean, then do like I do. Not always, just this one time.

So please enjoy this super easy recipe and the freaking Bread Bowl in which it comes. Also, feel free to be a little more expressive in your veggies. Mushrooms, green beans, celery, peas, even crazy ol’ fennel would be excellent additions or substitutions to the carrots and zukes I use. Go crazy. I believe in you.

There's a pretty rad Where's Waldo in this pic.
One more thing. I tried to use this blog to remake an earlier recipe and I decided that, although hilarious and full of awesome pictures, it's not that user friendly as a recipe guide. I constantly scrolled back and forth between the walkthru and the ingredients. Now, I'm going to include the measurements in the body of the walk-thru. Hopefully this will make this blog an actual tool for cooking and not just a self-congratulatory and/or self-deprecating Malkovich door into my kitchen doings.


Shizz Besides the Basics:
You might need superstrength to help you refrain from drinking all the wine before you have to cook with it. Other than that, your basic kitchen utensils should serve you well in this endeavor.


Ingredients (for two):
1 tablespoon all-purpose flour

½ cup fat free milk

¼ cup fat-free, less-sodium chicken broth

¼ cup dry white wine (a good rule of thumb about cooking with wines: don’t cook with wine you wouldn’t drink. If you have a fave pinot grigio or a sauv blanc or a whatev, use it. Perhaps stay away from the Thunderbird or Boones Farm)

1 tablespoon olive oil

1 skinny pat of butter

~ ½ cup chopped sweet onion

1 giant-ass boneless, skinless chicken breast (close to a pound), cut into bite-sized pieces

~ ½ cup sliced carrot (about 2 skinny ones, peeled)

~ ½ cup zucchini (approx. 3/4ths a medium zuke), sliced into ¼” half-moons

½ teaspoon salt, divided

½ teaspoon black pepper

1/8 teaspoon dried tarragon

½ teaspoon Italian Seasoning

2 (4.5 – 6 oz) country or peasant rolls, or marfarkin’ bread bowls


Order of Operations:
1. Preheat oven to 350. This is for toasting up ya bread bowls later in the game.
 
Let's all get fairly dissolved.


2. Place flour (1 Tbsp.) in a small bowl; slowly add milk (1/2 C.), stirring it up with a whisk to form a “slurry.” Make sure you get it fairly dissolved and un-lumpy. Add your chicken broth (1/4 C.) and wine (1/4 C.) to slurry, mixing well.


3. Get your large saucepan or high-sided frying pan out and put it over a medium flame to pre-heat.

Arise, Chicken Ziggurat!
4. Whilst our pan heats up, get your designated meat cutting board out and go to work on your chicken bress. You will want to remove any big fatty deposits and weird skin membranes or those sorta bloodclot looking things where the bone used to be. Then just cut it up into squares that will fit on your fork. Season up your chicken lumps with half of your salt (1/4 tsp.) and a couple of twists on the old pepper mill.


 5. Once your pan be hot, add your tablespoon of olive oil and your lil skinny pat of butter. The combo of these fats is what helps ya chicken brown up real nice (my chickens in the final pics is a little pasty because I totally spaced the butter pat. Oh Well).

All three of these things can make a grown man cry.


6. While your fats melt in the pan, slice up your onion until you have mostly half a cup of slightly larger than normal onion chops. This last round of onions I bought are particularly small and I used about half an onion. The other half didn’t mind at all.


7. Oil is hot, chicken is cubed and seasoned, and onion is chopped. Time for onion and chicken to get into the pan. I like for my chickens to not touch. I like a nice browned char and that suffers if you reduce your chickens’ surface area by making them touch other chickens. The onions can just go willy nilly wherevs.

Hands lookin like da dark side of Edward James Olmos.
 8. Sauté for approx 2 mins, then flip all the chickens over so their tans are even. This is a particularly boring and risky adventure since it takes about a million years to flip every chunk and the oil can get all poppin’ up at you. My advice is to have your family talk to you and try to distract you with dirty jokes and funny anecdotes so that the boring part is minimized and the risky part maximized and now everybody is having a laugh while you run cold water on your fresh grease burns. Yay!! Family Dinner!!

9. Whilst your chicken is changing from poison to awesome, it is time to work on your veg.

10. Wash everything up. Peel your carrots into your Stock Ziploc, and slice them up in ¼ inch slices.


What's the plural of Bris?

11. Zukes are next. Slice down the middle and place the cut side down on your chopping block. Slice both halves into ¼ inch half moons. If you have ever even heard of a zucchini, you have probably performed this little dance. I have faith in your ability to pull this off.


What are you cooking underthere? Underwear?

12. Add to your pan the sliced up carrots and zukes and your other ¼ teaspoon of salt. Follow suit with a few turns on the peppermill and your scant 1/8th teaspoon of weird, gross tarragon. Stir to coat.

13. Cover your business, and reduce your heat from 5 to 3.5 and let it cook for 4 minutes.


Milking your chicken.
14. When your internal or external kitchen timer alerts you that indeed 4 minutes have passed on this gay earth, then slowly stir your slurry into your chicken mixture. Turn your heat up to approx 5 or 6 and bring it to a boil. When you have achieved a boil, cover it up again, reduce heat to 4ish, and simmer 10 minutes or until your sauce thickens, while stirring occasionally.
This is how entitled suburban white women pop a cap.


15. Whilst your sauce is thickening and your veg cooking up, it is time to embark on bread bowl construction. Using your awesome bread knife, turn your roll on its side and cut the top off, about an inch or an inch and a half.


Pinching loaves.
16. Pinch out the guts of your bread bowl, leaving about a ¼ to a ½ inch thick shell that resembles a freaking bowl made out of freaking bread. The bread guts are great to use as breadcrumbs, or in making a crumble topping for mac-n-cheese, or snacking on for the duration of this dinner making. A million uses and still counting. Do not dare throw them shits away.

* doffs a bread hat*


 17. Place your bowls onto a cookie sheet and into the oven. I like to toast up the bread tops as well. Throw them dudes on the rack. Heat for approx 5 minutes, or usually the remainder of time on the chicken, whichever comes first. You want your bowls toasty, not petrified.


18. This would be an excellent time to use the last few minutes to toss together a simple green salad with tomatoes and avocado. Because a meal without avocado is seriously a meal I don’t want to bother eating.


Meat and two-veg goes in the hole.
19. Pop your bread bowls out of the oven, remove your chicken mix from heat, and let it cool off and thicken up for just a second while you get plates and set tables and ask everybody what they want to drink and pour yourself another glass of cooking wine. Scoop out half the chicken mix into one bowl. I am going to leave it up to you fine folks to figure out what to do with the other half of chicken mix and bread bowl. This is a learning process and it isn’t fair for me to cheat you out of the magic of self-discovery herein.

20. Plate it up and serve it up and watch as your family says Oh Damn, This Looks Awesome, when it was seriously the easiest shit you did all day. Bone Appetitty!!


One bread bowl + 1 ¼ cups of chicken mixture has approx. 500 calories and 8 grams of fat, but probably more since I used the colossal bread bowls and not the dinky 4.5 ouncers.

Tuesday, May 17, 2011

Burger Thursday


I realize it is not yet Thursday, but I feel like the people deserve enough time to reflect on and prepare for this recipe, in order to fully celebrate the joy that is...Burger Thursday.

I am experiencing one of those periods of transition that I fear will end up in a complete apple cart turnover. I don’t much care for upheaval. Unless we talking bout heavin’ up a spoonful of cobbler into my face, and then I am all for it. Preferably, I am a creature of habit. These habits are frequently fleeting and mismanaged, but some, like Burger Thursday, are just not to be fucked with. In my house, Burger Thursday, like Taco Monday, has a special place of reverence in the weekday schedule. When you come home to find a bad-ass burger on your plate at dinnertime, you know it's Thursday and the week is almost over and it’s only one more shitting day of going to work before it’s all weekendy and great again. I have been participating in Burger Thursday for approximately 15 months now, which, if one were to do the math, one would discover I have prepared, cooked, and eaten a literal shit-ton of burgers. I have tweaked and explored and started over from scratch about a billion times, and I think I have perfected my beef burger, which I will now share with your lucky, lucky asses. Some might say that this burg is overdressed. Some, over seasoned. It is possible that both of these things are true. However, this burger still balls out of control and I am both pleased and proud to share it with you, the unwashed masses. Time to Burg Out.

Sweet Dreams are made of These.
A note about the most special ingredient in the world: Several months ago, I was turned on to what is now one of my favorite ingredients with which to cook, ever – roasted green chiles from New Mexico. Yes, Ortega makes roasted green chiles that come diced in a blue can, but it’s the difference between Black Truffle cheese and Velveeta slices, which I shouldn’t have to tell you, is seriously significant. The thing that sucks about these delicious New Mexican green chiles, is that you have to buy them in bulk and the shipping costs are so high as to be almost preventative. My suggestion, is I guess to cop out and look for the Ortega chiles, or else suck it up and find somebody close to your home to split a case with you. I split a case, which gives me 6 jars of roasted green chiles to be used in almost any food that will sit still long enough for me to throw chiles on it. Also, I don’t shill for no man, but I do not mind from time to time sharing with you when I find an exceptional foods or company or vendor or piece of equipment. I recently re-upped my supply of green chiles and the particular company I buy from quoted me a price for product and shipping, upon which we both agreed, and payment was made and chiles was shipped. Shortly thereafter, I received an email from the chile company letting me know that, as it turned out, they ended up spending less on the shipping than they quoted me, so they just wanted to casually mention that they refunded the difference to mine credit card.

In Santa Fe, Hot = Extra Hot, Medium = Hot, Mild = Tourist.
Ladies and gentlemen, that shit just don’t ever happen. A conscientious capitalist. So now I am a big fan for life, not only of this company's products, but of their practices and I can without the slightest hesitation, whole-heartedly recommend these dudes and their freaking amazing green chiles. So, jump on over to www.SantaFeOleFoodCo.com and hit up some Original Medium Roasted New Mexico Green Chile. Trust me, six jars won’t hardly be enough. And “medium” is a little off the mark – them shits is hot. O snap, I just looked on their “where to buy” tab, and it would seem that some Albertsons’ and Whole Foods carry their line?! Well, Blow Me Down.

Now with extra bludgeoning power!

Shizz Besides the Basics:
I use a cast iron grill pan which I think I purchased quite economically from World Market several years ago. An outdoor grill or a frying pan would be just aces as well, I am sure.


Ingredients (for two burgs):
Patties:
½ pound of ground beef (I use the 93/7 because I am trying to watch my girlish figure)

~1/4 cup finely chopped onion (yellow or white, although shallots are divine here)

~2 teaspoons wheat germ

~1 heaping tablespoon of horseradish mustard

Coupla 3 or 4 big splashes of Worcestershire sauce

½ of a chipotle chili in adobo sauce, diced

Tony Chachere’s Spice N’ Herbs Seasoning, to taste

Toppings:
Sliced Tomato

Sliced avocado (1/4 per burg)

Red Leaf Lettuce

Sliced Mozzarella Cheese

Whole Wheat Buns

Dijon Mustard

1 smallish yellow onion, caramelized

Several heaping spoonfuls of Santa Fe Ole green chiles


Extras:
I always, always serve this burger with steamed broccoli and one serving of those Alexia Sweet Potato Fries, or the Alexia fries with the rosemary and olive oil. Or a little of both if I am having trouble making decisions in my life, which is often.

Order of Operations:
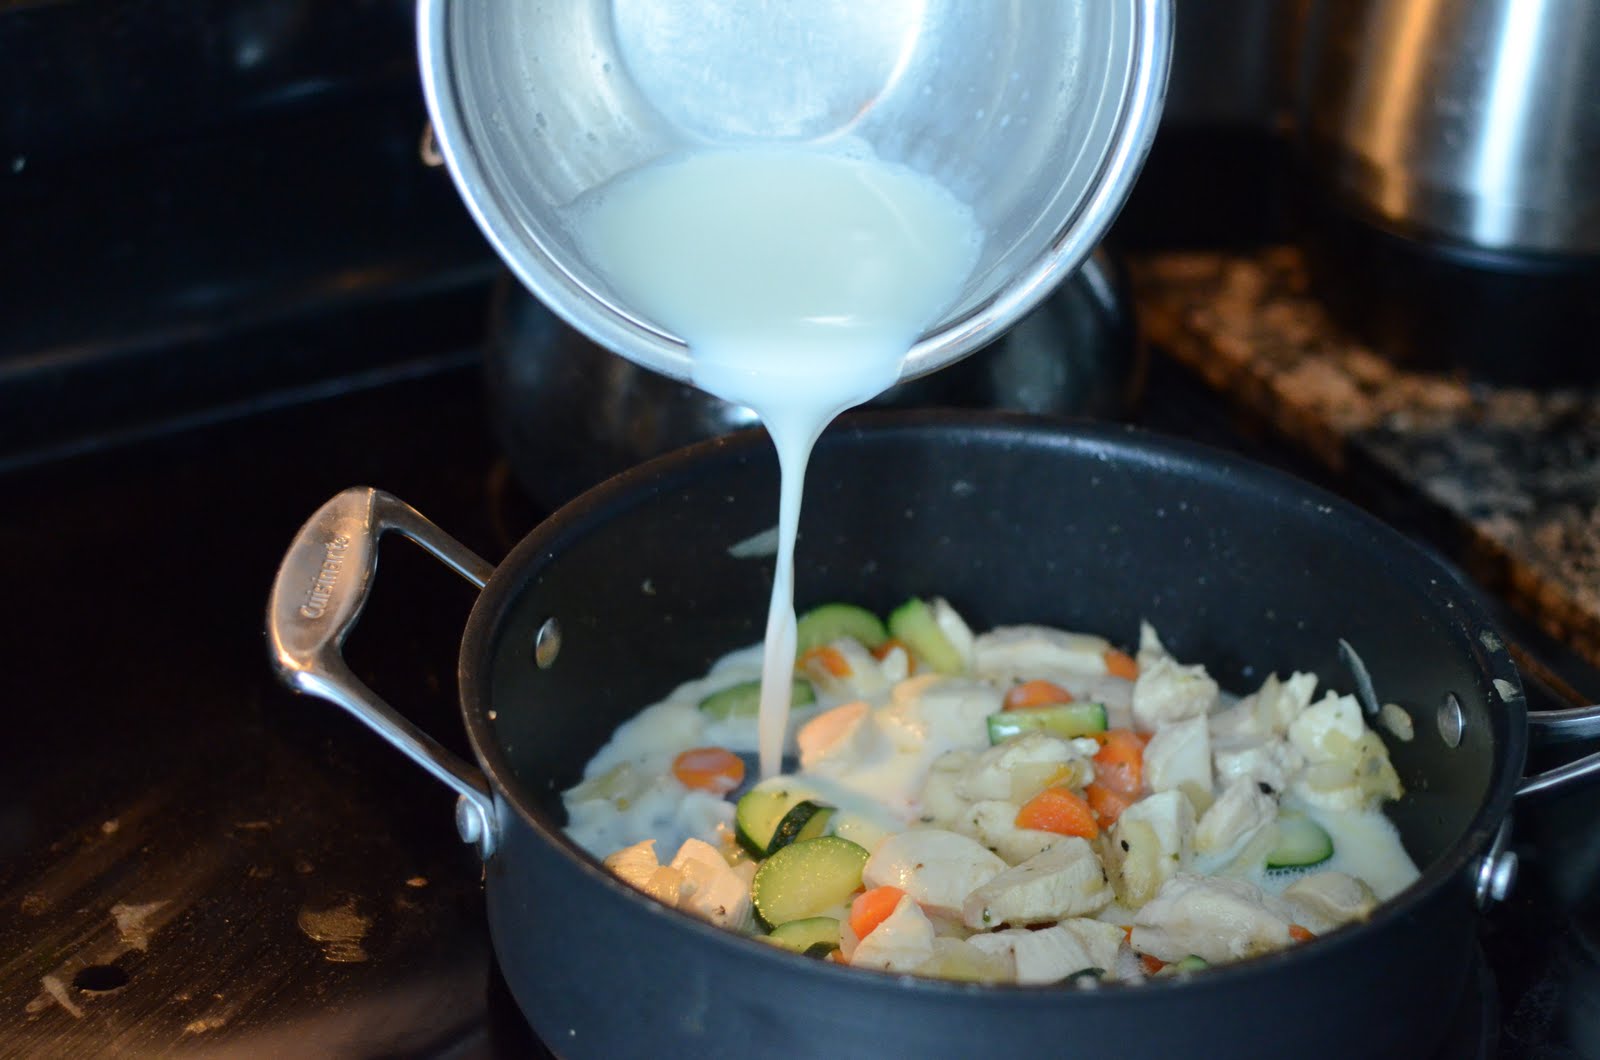
1. This whole process takes about an hour if you are caramelizing your onions professionally. It can take 25 minutes, if you are all like, nah forget dem onions. If you are not a chump, however, I encourage you to:
Slicing onions is a good way to mask your lack of emotion.

2. Set a large skillet over about a 4 flame and when it is hot, add about a tablespoon of olive oil and one skinny pat of butter. Slice your onion’s root and end off, and halve it, removing the skins and the root parts into your stock Ziploc. With your cut end down on your cutting board there, start making the skinniest slices you can without de-fingerizing yourself. Toss your onion slivers into your hot pan and stir them around to coat them in buttery awesomeness. After about 3 to 5 minutes, when they start getting limp and translucent (it happens to everybody), turn your heat down to like, seriously, 1 or 1 and a half. Now, there are some camps that say leave them alone entirely, and some that say stir very infrequently. I am of the latter camp because I can’t just leave shit alone, and my onions have suffered because of it. Caramelizing onions has always been a difficult process for me, and I still struggle with doing it correctly all the freaking time. Use the youtubes if you need real instruction. Or read a book, if you can still find one.

3. Additionally, beef cooks up better if it is at room temperature before you throw it on the heat. So, I take it out of the fridge and set it on the counter when I start up my onions. Let it get all warm and comfortable in its surroundings before I sneak attack it into tasteful submission.

4. Approximately half an hour before you wish to eat dinner, it will be time to start on your patties, etc. So until then, crack a beer, pet your dog, ask your honey how their day went. Everybody will be happy for the attention. They like you a lot.

5. If you are doing the store-bought oven-baked French fry thang, then go ahead and turn on your oven to 450 or whatever, and put your fries on their cookie sheet so when the pre-heat dinger dings you will already be Head of the Class. They usually take about 20 to 25 minutes to cook, so do your math backwards and plan appropriately.

6. OK, room temp ground beefy goes into your mixing bowl. Dice up your quarter onion or so into smaller than normal bits, but not like, pureed. Onion goes into the bowl.

More like Freedom's Mustard. Never forget.

7. Shake your bottle of horseradish mustard (French’s makes a fine one) and squeeze out a good heaping tablespoon or so right on top. Splash up your Worsheteseteschishire sauce.


Don't waste the seeds. Onanism is a sin.
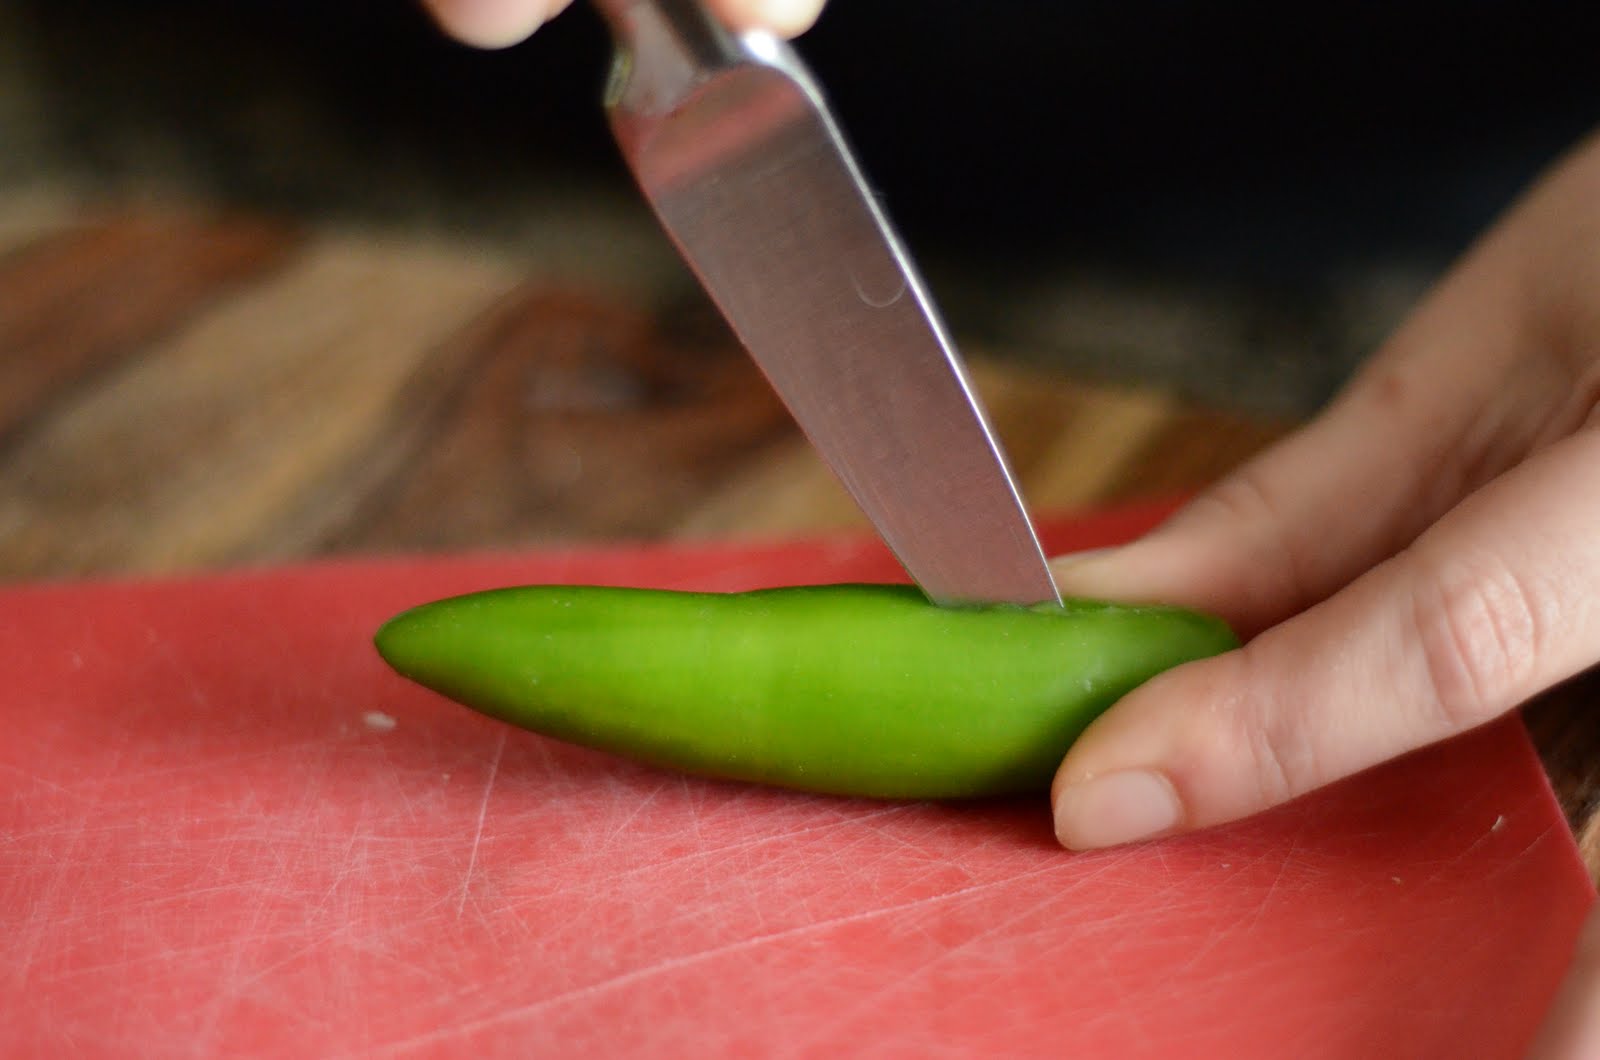
8. Take one chipotle chile from the can of adobo and slice it in half. Now, chipotles in adobo are pretty great things and you should always have some on hand to go in soups or sauces, or to mix with butter and spread on a roasted ear of corn, ya heard me? They add a lot of smoky flave and a little heat and they make a burger cooked inside, over electricity, taste more like a burger cooked outside, over flames. Or technically, smoldering coals, but you get the picture. They can, however, overwhelm even the most robust of meals like the beef burger, so I use about 3/4ths the amount that I want to use. I dice half of a large chipotle and then use 3/4ths of what I cut. You can do mas o menos as you see fit.

This is the kind of germs you WANT to spread.
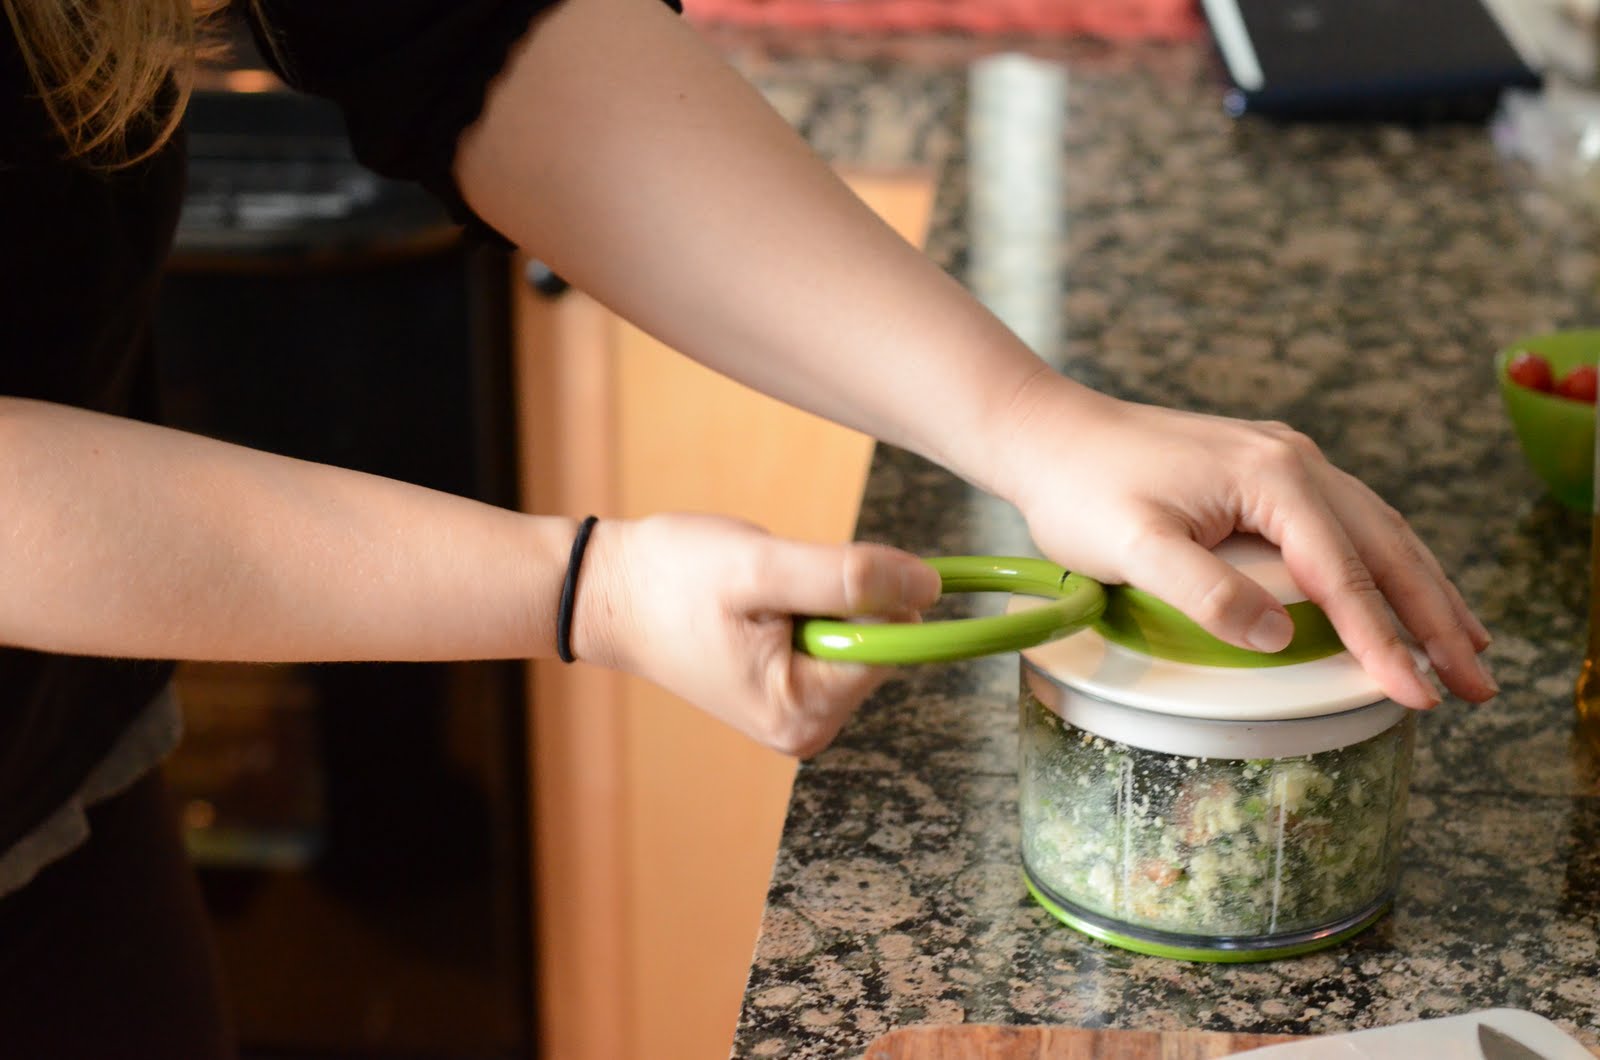
 9. Measure out a full tablespoon of wheat germ, or you can use bread crumbs, but wheat germs is good for you and really nutty and earthy and good tasting, whereas Progresso Italian Bread Crumbs – eh, not so much. Shake out about half of your tablespoon into your meat mix. You have to strike a balance between your wet and your dry. If you didn’t shake up your mustard, and you got a whole squirt of watery wet before you got your mustard, then maybe you want a little more wheat germ. Or if you were distracted by your fucking cat getting into some shit he KNOWS he is not supposed to be getting into and you put way too much wheat germ in it, well then I ‘spose you better be reaching for more of that mustard. You have probably made a burger before. You probably know how wet you like your burger. You probably understand that the wetter the burger, the more vulnerable the structural integrity of the patty, and the more likely you will lose burger content, upon the flipping of. You also probably know that you don’t want your burger so dry and crumbly that ya mamma’s vagina be eyein’ it with empathy, if you know whamsayin. Just add enough shit to make it work. You are probably gonna have some weird pieces of onion that want to creep out and misbehave, and that’s cool. It all comes out in the wash.

When handling meat, never forget to cup the balls.
10. You have in your bowl: your meat, wheat germ, chipotle, finely chopped onion, w. sauce, and mustard. Get your hands in there and squish. Blend it up and then divide into two equal halves and form each half into a patty, using your hands. Get your non-dominant thumb in there as a backstop and work your meatball into a flat disc, about most of an inch thick. You will know.


I do this to food in the store too.

11. Shape your patty, slap it down on your board, and poke your thumb directly in the center of it, making it as concave as your 14 year old chest was. This thumbprint will keep your burg from puffing up in the middle and ruining the perfectly flat surface on which to balance the crazy amount of shit you are fixing to stack upon and below it.


*burger gives thumbs up as it is lowered into vat of spices*

12. Once you have two fairly lean and ripply patties, grab hold of your Tony Chachere’s or similar blackening spices and give your burg a liberal dosing. This is where my burgs have come under fire. They can get a little salty on the backnote, because of dis right here. If you are averse to flavor, then omit this step, or only spice one side of your burg, or just use less, whatevs. But I like a spicy, flavory burg, so I double-side spice it.


Reminds me of the dating scene: fats and fruits.

13. Now turn on the heat under the cast iron grill pan to about 5 and let it heat up. During this time I let my burger patties rest and get used to their new shape, and I go about maybe stirring my caramelizin’ onions when I shouldn’t be, or slicing up tomatoes and washing off red lettuce leaves or slicing my avocado.


14. Once my grill pan is hot enough that the water I just flicked off my hand – both to check the temperature and also to antagonize my cat because it’s not fucking wet food time yet and I swear you are going to kill us both if you don’t get out from underfoot oh oops did I scare you with scary WATER?!? DID I?!? What a terrible tragedy for you, cat. You must really be upset and you should probably just go be by yourself for a little while and work it out and not be directly under the path of me and the hot-ass pan full of dripping burning beef fat that will surely kill me and you both, directly or indirectly, now or in the future – when those couple of drops of water hit that pan and immediately sizzle out of existence like not enough things do, well then it is time to cook ya damn burgah.

<Cheesy Caption Goes Here>
15. I like mine 4 minutes on one side, and then flip and slap the cheese on it, then 4 or maybe 5 more minutes, or until my cheese looks satisfactorily gooey. Whenever you deem your burg to be Done, remove it from the pan and allow it to rest for no less than 5 minutes. Excuse me, for no fewer than 5 minutes. If you use “less” there instead of “fewer” it is incorrect grammar. I am glad I was here to teach you that. O wow, speaking of teaching, I saw a parade this last weekend, and there was a float advertising a local private school and their banner was like, “St. Thomas: Spanish, Music, P.E.”. Seriously, how fucked up is it that the actual pull for the school is that they offer a fucking gym class. How is it that funding for public schools has been misappropriated and cut so fucking much, that now other schools merely offering music classes have a serious advantage? Why does this keep happening? I got mad at a parade.

The reception from this Broccoli Dish is better than DirectTV.

16. Now is a good time to get your broccoli steaming on.


Warm buns, hot potatoes.

17. Ok, pop your buns into your oven for no more than 4 minutes, and really only about 3, to get them as toasty as you pretended to be on prom night. When ya bunz is ready, take them over to your creation station and it is time to build the tower to Babylon.


18. Bottom bun gets slathered with a little Dijon. Next is half of your amazingly perfect-every-time caramelized onions. Then a generous layer of outrageous roasted green chiles.


Bacon: when one meat's not enough.


19. Then comes good ol’ burgah patty. Riiiiiiight on top.

20. One of us is having a piece of thick cut applewood smoked bacon, baked to crisp perfection, lovingly layered on top of the chiles. One of us is not.

The Tower of Burg-el. Oh, the foolish pride.


21. Next is the salad part. Tomatoes on the vine, sliced as thinly as I can manage, in a triple threat layer, slightly salt-and-peppered. Then rustle up your lettuce.


Market it as a "California Burger" by adding avocado.
22. Now, grab your quarter of thinly sliced avocado and deal it like cards onto your top bun. A little pressure from a butter knife can keep your avocado in place without squishing your awesome bread. Remove the fries and the broccoli from their respective heat sources, and put they asses on ya plate. I think we should all take a moment to reflect, on the magic that is happening right here, right now. It’s like we are watching the world wake up, from history.


23. Well folks, I don’t know what else to say but this: It is my best burger. It is the best one I can make and I hope you like it too.

Sunday, May 15, 2011

Cilantro-Serrano Pesto (with Chicken and Penne)


Lately, I have been eating pesto medicinally. I have had this recipe on my radar since I first purchased the cook book in which I found it (Cooking Light - Best of Everyday Favorites) more than 2 years ago. I foolishly believed that I was unable to make delicious homemade pesto sauces because as I am yet unmarried, I don’t own a freaking food processor. I guess if you are a white girl in these United States, when you get married, you are automatically awarded by the State one food processor and one Gucci-ass big ol’ stand mixer. It’s our 40 acres and mule. So I thought that homemade pesto, like motherhood and a decent credit rating, was just on the other side of the fence from me. ALAS, for the first time ever in my life I was mistaken. You CAN make pesto without the aid of a big fancy food processor – I did it with a little dinky onion chopper.

Lotta practice tearing wings off bugs as a child.
 This pesto is so fresh and crisp and summery flavored. I mean I guess it is summery flavored. I guess I remember what summer is like. This has been the longest and wettest and coldest pacific northwestern spring I have ever experienced. Moss is growing on everything I own. Sickly, sickly moss. I looooooooooooooooong for some freaking sunshine and this pesto recipe is so delicious, that I tricked myself into thinking I could eat it for dinner on the back porch. The soggy mossy porch. So, if you live in a place what already has summer, or at least where spring isn’t freezing monsoon season, then I encourage you to eat this recipe out of doors. For the rest of us, pretending will have to be enough.

Suggested use: This pesto goes fantastically over whole grain penne and a cup or two of halved cherry or grape tomatoes, which is how I will serve it for the purposes of this recipe. Additionally, it “rocks over London” mixed 50-50 with some thawed and squeezed dried frozen spinach, and a couple of tablespoons of goat cheese, and rolled up in a pounded flat chicken breast. It is delish on toast, in scrambled eggs, spread on sandwiches, really in any case where traditional basil pesto is used. As my dear mother has said more than one time, I would eat a fucking pine cone, if there was enough of this spread on it. It will keep for at least a week in the fridge, but I guarantee you will eat the hell out of it before it gets a chance to spoil.

An important, if overlooked, member of the UN of cheese.
Also, this recipe calls for Cotija cheese. Cotija is an aged Mexican cheese that is stupid amazing. It is salty and nutty and kinda crumbley like feta. They sell it in most grocery stores, but for some reason they segregate it from the other cheeses. In my little suburban universe, they always group it next to the orange juice, along with some kind of flan looking stuff. If you can’t find Cotija cheese at your grocery store, then use Parmesan cheese. Also, move.


Summa these parts = a whole lotta yumma.
Again, this recipe calls for a lot of fresh herbs, which can be pricey as hell, but also all of these herbs and peppers can be grown in pots or windowfarms fairly easily, and for notta lotta scratch. I am specifically planting the ingredients in my garden this year, so as I never ever have to be without this pesto again. Not without my Pesto.


Please enjoy this super easy and amazing recipe. And then enjoy it again spread on your turkey sandwich for lunch. And then again smeared on crusty bread with your next dinner. And then again on your English muffins, under your poached eggs and avocado for breakfast the next morning. And then again when you catch yourself just scooping a finger directly into it like peanut butter every time you pass through the kitchen until finally your significant other asks you if anything is wrong. God damn, it’s good.

Shizz Besides the Basics:
If you have a food processor, by all means use it. Add all the ingredients except the olive oil, and pulse until you have a paste, and then run it on low or whatever, and add the oil as it’s still going. Harness the power of the internet if you need further instruction.

For the rest of us: I have this awesome little onion chopper made by Chef’n. It has a big ol’ circular pull ring, like “the dog says bark” kinda action. I just threw everything in it and pulled the string until it mostly resembled the pesto I am accustomed to seeing in other people’s grocery carts. If your pesto is too thick and clumpy, loosen it up with a few tablespoons of starchy cooking water from your penne.

Ingredients:
Pesto:
1 ½ cups fresh cilantro

½ cup fresh mint

1/3 cup cotija cheese (or a widdle more or less, to taste)

3 tablespoons toasted pecan halves (buy them shits raw in the bulk section of your grocer’s store and then toast on a cookie sheet at 350 for 5 minutes, cool completely)

1 teaspoon kosher salt

2 garlic cloves (or 3 or 4 or maybe 5 if you’re a dirty birdy)

Cyrano de Penis Pepper.
1 Serrano chile, seeded and sliced (honestly, I wish I had used two. Serrano peppers are pretty much the best thing)

2 tablespoons extravirgin olive earl

2 teaspoons sherry vinegar (I include this part as a courtesy to the original recipe, but I have never used it, as I have never seen sherry vinegar in the grocery store. Never. I have some cooking sherry but it has a lot of salt in it because it’s the bad kind, so I don’t use it very often. If you have some fancy vinegar, I guess you should use it. I never have and I lived to tell, so who knows. It is stupid delish without it.)

1/8 teaspoon freshly ground black pepper


For pasta for two (with half the pesto left over for use on literally everything else):
1 ½ cups dry whole grain penne pasta

~1 cup chicken breast (I used the left over mixed chicken from the baked chicken used for soup and stock) but otherwise, about one large boneless skinless breast, cubed and pan sautéed until done.

1 cup cherry tomatoes, halved


Order of Operations:
1. Set your penne water to boiling.

2. As stated before, I really enjoy the no-mind practices involved with cooking. I tend to take the slower and more involved route to get to the prize at the end. We could discuss why, but I don’t think that’s really any big mystery. I also enjoy using an embarrassing amount of prep bowls and setting all of my ingredients out before hand, and having them all in order and ready to go when I need them. It soothes my self-diagnosed and wholly invented OCD. Also I forget things a lot. Where am I? Oh right.

A Whore's Bath. Also, wash ya herbs.
3. Wash and spin your herbs. Begin the slow and mindful and mindless task of plucking each cilantro leaf from its stem, and place them in a bowl.

4. Mint follows suit. Alternatively, you can wash your herbs and dump them stems and all into your food processor.

5. Crumble with fingers or attempt to grate your fantastic cotija cheese.


C D Cds?
6. Using a smaller paring knife, open up your washed Serrano. See them seeds? Those will get hot juice on your fingers which will burn your eyes and peepee and other mucus membranes if you do not wash hands directly after handling your peppers. Only you can prevent forest fires.
The little men in the boat.


7. Remove the fire seeds and discard. I use a plastic measuring spoon like a scoop. They make specific pepper de-seeding devices, but come on. You have a drawer full of shit you don’t use already. Find something in there.


Don't mince words, only chili peppers.


8. Slice up your safely seeded Serrano into baby tiny pieces.


Garlic Press.


9. Use your big knife to pop the garlic bulbs on a cutting board to remove their skins. I cut out the root also, for stock purposes mostly, and vanity.


It would be cooler if pasta screamed like shellfish.


10. Your pasta water should be boiling like hell by now, and you shoulda probably already added and started cooking your penne. Sort it out.


Food processor, schmood processor.
11. As I go along through this list, I am putting my ingredients into prep bowls. This isn’t really a necessary or even valuable step, in any way, other than it makes for better pictures maybe. You can and probably should, be just tossing these ingredients into the bowl of your food processor, or into the bowl of your dinky onion chopper, as you go through them and get them ready to go. If you are weird and particular like myself, then go ahead now and dump all your prep bowls into your processor. Cilantro, mint, cheese, salt, pecans, garlic and Serrano peppers go into the mixer-upper of your choosing.

12. Process by whatever means necessary until well blended. For me that means about 15 to 20 pulls on the ol’ speak n spell ring.


My food chute not pictured.
13. Add your olive oil. Either thru the “food chute” or just open the lid up and dump it in, before re-lidding and another 5 to 10 string pulls.

14. Scrape pesto out into a large bowl and add sherry vinegar (yeah, right) and black pepper. Well done, everybody.


Cut down the road, not across the street.

15. Wash and slice your cherry tomates. I can’t decide if I like to slice them horizontally or acrost the middle, so I do half and half which satisfies my weird empathy issues and my need for symmetry quite well.


I serve my pasta Al Dentata.


16. Penne gets drained (but reserve about a half cup of cooking water) and into the pasta bowl.


17. Add as much or as little pesto as you like to your pennepasta. Couple of tablespoons of pasta water right down in the middle of it all, add your chicken and tomatoes, and stir it up 'til it is time to disco.


18. Serve it up alone, or with a lil salad and veg and bread and you got yourself a little dinner going here. Big ups.


19. This pasta and pesto action has about 440 calories and 14 gramma fatso in it, if you have to know.